Downgrading with Hardware flasher: Difference between revisions
m (→NOR) |
m (→NOR) |
||
| Line 110: | Line 110: | ||
! Filename !! Size !! Remarks !! <code>SHA1</code> !! <code>MD5</code> !! <code>CRC32</code> !! <code>CRC16</code> | ! Filename !! Size !! Remarks !! <code>SHA1</code> !! <code>MD5</code> !! <code>CRC32</code> !! <code>CRC16</code> | ||
|- | |- | ||
| style="text-align:center; background-color:#DDFFDD;" | [http://www.ps3devwiki.com/files/lv2diag/3.55%20downgrader/FILE1/Lv2diag.self Lv2diag.self (365.5 KB)] || style="text-align:center; background-color:#DDFFDD;" | 374272 || style="text-align:center; background-color:#DDFFDD;" | 3.55 get in FSM * || style="text-align:center; background-color:#DDFFDD;" | <code>1ED037740D67FEBACA6449CABFF4E95400C9E2EE</code> || style="text-align:center; background-color:#DDFFDD;" | <code>[https://www.google.com/#q=099F33A7967F99E91C07E870FD78B3DB 099F33A7967F99E91C07E870FD78B3DB]</code> || style="text-align:center; background-color:#DDFFDD;" | <code>9338ABF2</code> || style="text-align:center; background-color:#DDFFDD;" | <code>4FCC</code> | | style="text-align:center; background-color:#DDFFDD;" | [http://www.ps3devwiki.com/files/lv2diag/3.55%20downgrader/FILE1/Lv2diag.self Lv2diag.self (365.5 KB)] || style="text-align:center; background-color:#DDFFDD;" | 374272 || style="text-align:center; background-color:#DDFFDD;" | 3.55 get in FSM * || style="text-align:center; background-color:#DDFFDD;" | <code>[https://www.google.com/#q=1ED037740D67FEBACA6449CABFF4E95400C9E2EE 1ED037740D67FEBACA6449CABFF4E95400C9E2EE]</code> || style="text-align:center; background-color:#DDFFDD;" | <code>[https://www.google.com/#q=099F33A7967F99E91C07E870FD78B3DB 099F33A7967F99E91C07E870FD78B3DB]</code> || style="text-align:center; background-color:#DDFFDD;" | <code>9338ABF2</code> || style="text-align:center; background-color:#DDFFDD;" | <code>4FCC</code> | ||
|- | |- | ||
<!--// | <!--// | ||
| [http://www.ps3devwiki.com/files/lv2diag/3.50%20downgrader/FILE1/Lv2diag.self Lv2diag.self (365.5 KB)] || 374272 || 3.50- get in FSM || <code>1E770010A3A6EF572AF39783A04DF792670998D3</code> || <code>[https://www.google.com/#q=90168C03B217CE775A7839D87BBFF2A3 90168C03B217CE775A7839D87BBFF2A3]</code> || <code>D1F0AAFC</code> || <code>CD8D</code> | | [http://www.ps3devwiki.com/files/lv2diag/3.50%20downgrader/FILE1/Lv2diag.self Lv2diag.self (365.5 KB)] || 374272 || 3.50- get in FSM || <code>[https://www.google.com/#q=1E770010A3A6EF572AF39783A04DF792670998D3 1E770010A3A6EF572AF39783A04DF792670998D3]</code> || <code>[https://www.google.com/#q=90168C03B217CE775A7839D87BBFF2A3 90168C03B217CE775A7839D87BBFF2A3]</code> || <code>D1F0AAFC</code> || <code>CD8D</code> | ||
|- //--> | |- //--> | ||
| style="text-align:center; background-color:#FFDDDD;" | [http://www.ps3devwiki.com/files/lv2diag/3.55%20jaicrab%20downgrader/Lv2diag.self Lv2diag.self (227.38 KB)] || style="text-align:center; background-color:#FFDDDD;" | 232832 || style="text-align:center; background-color:#FFDDDD;" | jaicrab noBD patched || style="text-align:center; background-color:#FFDDDD;" | <code>[https://www.google.com/#q=180823003B086D9D49BC7F83BEA9C769BF73A5EA 180823003B086D9D49BC7F83BEA9C769BF73A5EA]</code> || style="text-align:center; background-color:#FFDDDD;" | <code>3615770407C0C3FA00D8CA49C8ADB362</code> || style="text-align:center; background-color:#FFDDDD;" | <code>25E85CFB</code> || style="text-align:center; background-color:#FFDDDD;" | <code>EDD0</code> | | style="text-align:center; background-color:#FFDDDD;" | [http://www.ps3devwiki.com/files/lv2diag/3.55%20jaicrab%20downgrader/Lv2diag.self Lv2diag.self (227.38 KB)] || style="text-align:center; background-color:#FFDDDD;" | 232832 || style="text-align:center; background-color:#FFDDDD;" | jaicrab noBD patched || style="text-align:center; background-color:#FFDDDD;" | <code>[https://www.google.com/#q=180823003B086D9D49BC7F83BEA9C769BF73A5EA 180823003B086D9D49BC7F83BEA9C769BF73A5EA]</code> || style="text-align:center; background-color:#FFDDDD;" | <code>[https://www.google.com/#q=3615770407C0C3FA00D8CA49C8ADB362 3615770407C0C3FA00D8CA49C8ADB362]</code> || style="text-align:center; background-color:#FFDDDD;" | <code>25E85CFB</code> || style="text-align:center; background-color:#FFDDDD;" | <code>EDD0</code> | ||
|- | |- | ||
|} | |} | ||
Revision as of 19:49, 16 May 2013
Dump
Connect your Hardware flashing device and make sure you are getting 100% correct, valid, verified dumps.
Checking console capability of running 3.55
Compare the values found in your dump with those in the metldr+bootldr sizes table
If not having a dump, use the MinVer PUP method
Note:
- The mention of minimal version praxis on several other wikipages is only a rough indication.
- The two most accurate ways are to look at the actual dump and the MinVer PUP method itself, instead of flying blind on SKU tables and datecodes
metldr+bootldr sizes
You can check metldr and bootldr sizes easily with HxD
- either after extracting flash with Flowrebuilder and opening seperate files
- or by looking in the unextracted Flash dump at the correct offset.
This table lists some common known values for your convenience as quick lookup:
| IDPS/Product Code | SKU - Datecode / Manufacturing date | metldr offset | bootldr | Notes | lowest known firmware | |||
|---|---|---|---|---|---|---|---|---|
| 0x2F077 (NOR) 0x80877 (NAND) |
0x81E (NOR) 0x4081E (NAND) |
0x842 (NOR) 0x40842 (NAND) |
size | 0xFC0002 (NOR) 0x02 (NAND) |
0xFC0012 (NOR) 0x12 (NAND) | |||
| n/a | CEB-2030 (MPU-501) PROTO | n/a | n/a | 28C20 | 28 BE | 28 BE | Patch + FSM = OK | <=0.50.003 |
| 01 | DEH-Z1010 (TMU-520) SD | 14 20 | 11 3E | 2D020 | 2C FE | 2C FE | Patch + FSM = OK | <=0.80.004 |
| 01 | DECR-1000 (TMU-520) DECR Every DECR manufactured before January 2009 Share the same BL/Metldr revisions | EC 40 | 0E C0 | 2A840 | 2A 80 | 2A 80 | Patch + FSM = OK | <=0.85.010 |
| 01 | ?DEH-H1001-D? (COOKIE13) CEX | EC 40 | 0E C0 | 2A830 | 2A 7F | 2A 7F | Patch + FSM = OK | <=0.85.010 |
| 01 | DEH-H1000A-E (COK-001) DEX | EC 70 | 0E C3 | 2A1E0 | 2A 1A | 2A 1A | Patch + FSM = OK | <095.001 |
| 01 04 |
CECHAxx (COK-001) CECHExx (COK-002) |
EE 10 | 0E DD | 2A430 | 2A 3F | 2A 3F | Patch + FSM = OK | 1.00 1.00 |
| 01 02 03 01 |
CECHAxx (COK-001) with 1.00 from factory CECHBxx (COK-001) CECHCxx (COK-002) DECHAxx (COK-001) DEX |
ED A0 | 0E D6 | 2A2E0 | 2A 2A | 2A 2A | Patch + FSM = OK | 1.00 1.00 1.00 1.00 |
| 03 | CECHCxx (COK-002) with 1.00 from factory | EB F0 | 0E BB | 30480 | 30 44 | 30 44 | Patch + FSM = OK | 1.00 1.00 |
| 01 02 03 |
CECHAxx (COK-001) CECHBxx (COK-001) CECHCxx (COK-002) |
ED E0 | 0E DA | 2A3B0 | 2A 37 | 2A 37 | Patch + FSM = OK | 1.00 1.00 1.00 |
| 04 05 |
Namco System 357 (COK-002) ARC CECHGxx (SEM-001) |
E7 B0 | 0E 77 | 2E900 | 2E 8C | 2E 8C | Patch + FSM = OK | ?1.90? 1.90 |
| 05 06 |
CECHGxx (SEM-001) CECHHxx (DIA-001) |
E7 B0 | 0E 77 | 2F200 | 2F 1C | 2F 1C | Patch + FSM = OK | 2.30 2.30 |
| 05 06 |
CECHGxx (SEM-001) CECHHxx (DIA-001) |
E8 C0 | 0E 88 | 2EF80 | 2E F4 | 2E F4 | Patch + FSM = OK | 2.30 2.30 |
| 06 07 |
CECHHxx (DIA-001) CECHJxx (DIA-002) with 2.30 from factory - datecode 8B |
E8 E0 | 0E 8A | 2EF80 | 2E F4 | 2E F4 | Patch + FSM = OK | 1.97 2.30 |
| 03 06 06 |
CECHExx (COK-002) CECHHxx (DIA-001) CECHMxx (DIA-001) |
EA 60 | 0E A2 | 2EE70 | 2E E3 | 2E E3 | Patch + FSM = OK | 1.97 1.97 |
| 07 | CECHJxx (DIA-002) CECHKxx (DIA-002) datecode 8C |
EA 60 | 0E A2 | 2EE70 | 2E E3 | 2E E3 | Patch + FSM = OK | 2.30 |
| 08 07 08 |
Namco System 357 (VER-001) ARC DECHJxx (DIA-002) DEX CECHLxx / CECHPxx (VER-001) |
E8 D0 | 0E 89 | 2EAF0 | 2E AB | 2E AB | Patch + FSM = OK | ?2.45? 2.16 2.45 |
| 08 | CECHLxx (VER-001) | E8 D0 | 0E 89 | 2EB70 | 2E B3 | 2E B3 | Patch + FSM = OK | 2.45 |
| 08 09 |
CECHLxx (VER-001) with 2.30 from factory - datecode unknown CECH-20xx (DYN-001) with 2.76 from factory, datecode unknown |
E8 90 | 0E 85 | 2F170 | 2F 13 | 2F 13 | Patch + FSM = OK | 2.30 2.70 |
| 09 | DECR-1400 (DEB-001) DECR with 2.60 from factory - manufacture date June 09 |
E8 90 | 0E 85 | 2F170 | 2F 13 | 2F 13 | Patch + FSM = OK | 2.60 |
| 09 | CECH-20xx (DYN-001) | E9 20 | 0E 8E | 2F3F0 | 2F 3B | 2F 3B | Patch + FSM = OK | 2.70 |
| 0A | CECH-21xx (SUR-001) | E9 20 | 0E 8E | 2F4F0 | 2F 4B | 2F 4B | Patch + FSM = OK | 3.20 |
| 03 0B 0B |
CECHExx (COK-002W) refurbished CECH-25xx (JTP-001) with 3.40 from factory - datecode 0C CECH-25xx (JSD-001) with 3.41 from factory - datecode 0C |
E9 20 | 0E 8E | 2F4F0 | 2F 4B | 2F 4B | Patch + FSM = OK | 3.40 3.40 3.40 |
| 0B 0B |
CECH-25xx (JSD-001) with 3.56 from factory - datecode 0D CECH-25xx (JTP-001) with 3.56 from factory - datecode 1A |
E9 60 | 0E 92 | 2F570 | 2F 53 | 2F 53 | Patch + FSM = OK | 3.50 3.50 |
| 0B 0B 0B |
CECH-25xx (JTP-001) with 3.56 from factory - datecode 1A (rare) CECH-25xx (JSD-001) with 3.56 from factory - datecode 1B (common) CECH-25xx (JTP-001) with 3.56 from factory - datecode 1B (common) |
E9 60 | 0E 92 | 2F5F0 | 2F 5B | 2F 5B | (RLOD+)poweroff @ downgrade 355 (3.56+ + spkg fix + signed 3.55 priv : should work) Patch + noFSM = OK |
3.56 3.56 3.56 |
| 0B 0B 0C |
CECH-25xx (JSD-001) with 3.60 from factory - datecode 1B CECH-25xx (JTP-001) with 3.60 from factory - datecode [N.A.] CECH-30xx (KTE-001) with 3.65 from factory - datecode [N.A.] |
F9 20 | 0F 8E | 2FFF0 | 2F FB | 2F FB | "metldr.2" (RLOD+)poweroff @ downgrade 3.55 (RLOD+)poweroff @ Patch + noFSM |
3.60 3.60 3.60 |
| 0C | CECH-30xx (KTE-001) with ? from factory - datecode [?] | F9 B0 | 0F 97 | 30070 | 30 03 | 30 03 | "metldr.2" (RLOD+)poweroff @ downgrade 3.55 (RLOD+)poweroff @ Patch + noFSM |
? |
| 0C | CECH-30xx (KTE-001) with 3.72 from factory - datecode [1C] | F9 B0 | 0F 97 | 300F0 | 30 0B | 30 0B | "metldr.2" (RLOD+)poweroff @ downgrade 3.55 (RLOD+)poweroff @ Patch + noFSM |
3.72 |
| 0D 0D 2C |
CECH-40xx (MSX-001) CECH-40xx (MPX-001) CECH-40xx (MSX-001) '12GB' |
F9 B0 | 0F 97 | 301F0 | 30 1B | 30 1B | "metldr.2" (RLOD+)poweroff @ downgrade 3.55 (RLOD+)poweroff @ Patch + noFSM |
4.20 ? 4.22 |
| 12 | CECH-42xx (PQX-001) '12GB' | F9 B0 | 0F 97 | 301F0 | 30 1B | 30 1B | "metldr.2" (RLOD+)poweroff @ downgrade 3.55 (RLOD+)poweroff @ Patch + noFSM |
4.20 ? 4.22 |
Patch the dump & Reflash it to the console
For patching you can use:
- Hexeditor (e.g. HxD)
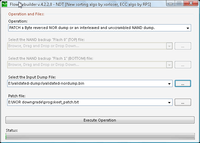
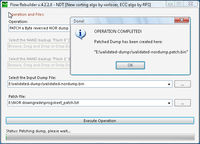
- Flowrebuilder (both NOR + unified NAND)
- in case of Progskeet, latest Winskeet/iSkeet/YASkeet (both NOR + unified NAND)
- BwE NOR/NAND Patcher
NAND
Use NAND patches only on NAND consoles, not on NOR!
| Target area | Patchfile | NAND Offset | Paste length | Remarks |
|---|---|---|---|---|
| ROS0 | patch1 (7 MB) | 0x0C0030 | 0x6FFFE0 | CoreOS (prepatched 3.55) |
| ROS1 | patch1 (7 MB) | 0x7C0020 | 0x6FFFE0 | CoreOS (SAME as ros0) |
| trvk_prg0 (0x91800) trvk_prg1 (0x92810) trvk_pkg (0x93800) |
patch2 (16 KB) | 0x91800 | 0x4000 | one big patch overlapping several revoke area's |
(above patches in a single package + autopatcher file: NAND downgrade.rar mirror)
NOR
Use NOR patches only on NOR consoles, not on NAND!
| Target area | Patchfile | NOR Offset | Paste length | Remarks |
|---|---|---|---|---|
| ROS0 | patch1 (7 MB) | 0x0C0010 | 0x6FFFE0 | CoreOS (prepatched 3.55) |
| ROS1 | patch1 (7 MB) | 0x7C0010 | 0x6FFFE0 | CoreOS (SAME as ros0) |
| trvk_prg0 (0x40000) trvk_prg1 (0x60000) trvk_pkg0 (0x80000) trvk_pkg1 (0xA0000) |
rvk-040000 (512 KB) | 0x40000 | 0x80000 | one big patch overlapping several revoke area's |
(above patches in a single package + autopatcher file: NOR downgrade.rar mirror)
E3 Flasher
Use these instead, otherwise you get into a maze of bytereversing: E3 Manual downgrade patches or use BwE NOR/NAND Patcher
Reinstall firmware in Factory Service Mode
For this step it is required to have the console fully assembled (connected PSU, harddrive, wifi/bt board, blu-ray drive etc).
- Use the PSGrade/JIG dongle to trigger Factory Service Mode
- Remove power from the console (rear power switch or remove powercord)
- Put PSGrade/JIG dongle in the rightmost USB port (closest to the Blu-Ray drive)
- Power the console so it is in standby (rear power switch or attach powercord)
- Press power button on front of the PS3 then immediately press eject within ~100ms
- If powered on correctly your dongle will light up (usually green) and trigger Factory Service Mode. The PSGrade will then power off the console. If it boots into the XMB with a red FSM logo in the corner you are using an old PSGrade.
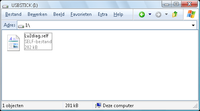
- Put the Lv2diag.self (see below) and a pre-patched firmware to install (named PS3UPDAT.PUP) in root of your USB Mass Storage Device and plug it in the PS3 (in the same port as the PSGrade).
- Turn PS3 on and it will automatically install the firmware you had put there. You will not have anything on the screen, you can only tell it is installing by the flashing USB and PS3's HDD light
- PS3 will turn itself off after finishing the firmware installation (If it flashes red the firmware did not install correctly).
A logfile should be present in root of the USB Mass Storage Device with no errors
See also Downgrading with PSgrade Dongle, which also contains alot of ready to use PSgrade HEX files for several dongles.
PUP to use
Rogero V3.7 (mirror / MD5:8f8166b25d6bed891f292c77de5c4b28)
for noFSM, use 9.99 downgrader instead: MD5:b67747f529d047d63151786544a58b50
or any firmware with prepatched lv1 (no syscon hash checks)
Note: if your end-goal is a 3.56+ MFW, then it is safer to downgrade first to 3.55. Upgrading in service mode (mostly errors out 0x8002f14e) is never recommended (only lower or same version).
Different Factory Service Mode SELFs
NAND
For factory Service Mode install:
- if using the normal lv2diag : Use a NoBD patched PUP (e.g. Rogero NoBD PUP) (to prevent error 0x8002f057)
- if using the jaicrab NoBD lv2diag : Use the Rogero normal PUP - see note below (and redump flash after FSM to check both ROS)
note: since V3 Rogero is only available as noBD, use that one with normal lv2diag.self
NOR
Use the normal lv2diag and use the Rogero normal PUP
Only when having a console with a broken bluraydrive, you either:
- use the normal lv2diag : Use a NoBD patched PUP (e.g. Rogero NoBD PUP) (to prevent error 0x8002f057)
- use the jaicrab NoBD lv2diag : Use the Rogero normal PUP - see note below
note: since V3.7 Rogero is only available as noBD, use that one with normal lv2diag.self
| Filename | Size | Remarks | SHA1 |
MD5 |
CRC32 |
CRC16
|
|---|---|---|---|---|---|---|
| Lv2diag.self (365.5 KB) | 374272 | 3.55 get in FSM * | 1ED037740D67FEBACA6449CABFF4E95400C9E2EE |
099F33A7967F99E91C07E870FD78B3DB |
9338ABF2 |
4FCC
|
| Lv2diag.self (227.38 KB) | 232832 | jaicrab noBD patched | 180823003B086D9D49BC7F83BEA9C769BF73A5EA |
3615770407C0C3FA00D8CA49C8ADB362 |
25E85CFB |
EDD0
|
* recommended default choice, see above notes mirrors: http://mir.cr/1HRZ3M2N / http://mir.cr/060LU86N / http://mir.cr/ATL2LSGI / http://www.mediafire.com/download.php?zmcgdgj6sdh87se /
Check the logfile
After installation of the firmware, take the created logfile in root of USB Mass Storage Device and look if it contains errors (pastie the log if you want to ask for help online on IRC)
Tip:
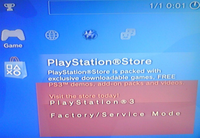
- You can boot console to XMB while still in FSM, if you want to be really sure it installed fine.
Remarks:
- If you are using a component cable the image might be garbled.
- If you are using HDMI, you don't have any screenoutput at all after the "press PS-button" message. (note: conflicting reports on HDMI working or not in FSM)
Getting out of Factory Service Mode
If everything went fine without errors, you can take the console out of service mode and enjoy your downgraded console :)
- Put the Lv2diag.self (see below) in root of your USB Mass Storage Device and plug it in the PS3 (again, in the rightmost USB port).
- Turn PS3 on, it will trigger Factory Service Mode off and shutdown.
| Filename | Size | Remarks | SHA1 |
MD5 |
CRC32 |
CRC16
|
|---|---|---|---|---|---|---|
| Lv2diag.self (201.42 KB) | 206256 | get out FSM | 329877CBD47B994EC0AFCEA6AF98114FD9E5128B |
7A20BFDAE65EEFB47A4425DB1B52DCDE |
72740080 |
502A
|
Dehashing
Goal: To be able to install unpatched firmwares (or 4.2x/4.3x MFW later on) on consoles that where previously on 3.56+ (highly recomended)
You can use either or both QA/reFSM way:
QA dehashing
- Patch as normal downgrader (ROS 0/1 + RVK prg/pkg)
- install prepatched firmware in factory service mode
- use the lv2diag.self [file2] to exit factory service mode
Above is already done if you just downgraded
Dump the flash first, in case you brick on dehashing, you can easily flash this one back to debrick
- Install and run QA-toggle and make sure it beeps as written in that readme
- Note: for above to work, you need a BD drive connected and married to the console (except CECH-25xx and later).
- Note: to make sure you enabled QA, not accidently disable it, do the button combo (if it shows menu, then console is QA-flagged correct. Remove the QA-toggle package to prevent it from getting QA-flag reset).
- Set your cursor on (not in) Network Settings and press the key combo (all at the same time): L1+L2+L3(press_left_stick)+R1+R2+dpad_down
- Make sure no disc is inside BD drive and Poweroff console
- Put unpatched official firmware (e.g. 3.55) on USB Mass Storage device as /PS3/UPDATE/PS3UPDAT.PUP and insert in PS3
- Note: It has to be a firmware without 'downgrader patches'
- Boot into Recovery Menu, select "6. System Update" to reinstall firmware.
- If installation finishes without error (there will be no logs you can check!) and boots XMB OK, then dehashing was successful (the really super paranoid people can do step 4 twice to make sure that both ROS are rehashed).
Congrats, you now finished downgrading and dehashing. Console runs 3.55 and any firmware of choice can be installed, no longer needing to be patched for downgrader.
reFSM dehashing
- Patch as normal downgrader (ROS 0/1 + RVK prg/pkg)
- install prepatched firmware in service mode
Above is already done if you just downgraded
Dump the flash first, in case you brick on dehashing, you can easily flash this one back to debrick
- Put console in service mode with JIG (in case you left service mode and ran the prepatched firmware in normal mode)
- Use normal lv2diag.self and unpatched official firmware (e.g. 3.55) on USB Mass Storage device in root and let the system reinstall that in factory service mode (FSM).
- After installation is finished console will turn off. Check UPDATER_LOG.TXT in root of USB Mass Storage device (it should have "manufacturing updating SUCCESS(0x8002f000)" in end section).
- If everything is OK, then reinsert USB Mass Storage device and let it install again.
- After installation is finished console will turn off. Check UPDATER_LOG.TXT in root of USB Mass Storage device (it should have "manufacturing updating SUCCESS(0x8002f000)" in end section).
- If everything is OK, then console should now be dehashed and no longer brick with any unpatched firmwares.
- Replace lv2diag.self for he one getting out of service mode and put in root.
- Power on console, it should turn off and not boot XMB.
- Remove USB Mass Storage device and boot console normally. If all went well it should load to XMB now. Congrats, you now finished downgrading and dehashing. Console runs 3.55 and any firmware of choice can be installed, no longer needing to be patched for downgrader.
Remarks
ReFSM way is strongly recomended over QA if you do NOT install a nonpatched firmware
- FSM gets you a installer LOG (QA does not)
- FSM does not delete ACT.DAT (QA does)
- FSM can be done without a BD drive (QA needs the BD drive present)
- FSM can be done without seeing XMB or Recovery (QA needs Recovery and XMB for the QA-flagging package)
Both ways require installing nonpatched firmware to dehash syscon bank. QA-flag can be removed/reset (but it is better to keep it flagged) after succesfull dehash, without bricking.
 <domelec> dehash procedure: fsm install ofw
           after console turns off take out usb stick and look at log file,
           if log is ok then reinsert usb stick and turn on console,
           ofw will then reinstall, after console turns off again
           take out usb stick and check log, if ok then exit fsm
 <eussNL> do double FSM OFW, then get out of service mode.
 <eussNL> check everything is working
 <eussNL> THEN and only THEN, you can install whatever you want, in recovery.
 <eussNL> there is no need for factory mode after dehashing complete
 <eussNL> in fact, if everything works on OFW 3.55 after dehashing,
 <eussNL> you can install Rogero V3.2 in recovery and QA-extra flag it
 <eussNL> if OFW 3.55 works then you proven that you dehashed
 <eussNL> so after that you can install whatever MFW 3.55 you want
 <eussNL> If for some reason you cannot dehash because of BD or BT errors
          then you can use PS3MFW Builder and the broken Blueray / broken Bluetooth
          tasks. Do not select downgrader patches, or you will not dehash!
 <eussNL> BD error can be persistant if flasher is still attached,
          see: http://www.ps3devwiki.com/wiki/Talk:Hardware_flashing#BD_drive_not_found_problem
 <eussNL> 3 options: 1. open R7/R8  /  2. remove flasher control lines / 3. remove all flasher wiring
 <playonlcd> i  think you can update on wiki "dehashing with jaicrab is not recommended
             and will not dehash as needed and thus semibrick by syscon hash panic


